by Ken Whiteside
DataXperts
Using the Foreach Loop Container
So you have been given access to a feed of text files that contain some information you need pull into a staging table for further analysis. Each file name will be unique, but will begin and end with a certain string such as “Support_Calls_xxxxxxxxxxx.txt” The files will always have the same layout. This is the perfect scenario for the Foreach Loop Container. This widget will cycle through each file matching the pattern you tell it, and do whatever you want to it.
The container will know the file name it is working on, and this name should be assigned to a package variable to be used in the looping logic.
Create the Dataflow with the Wizard
I usually use the wizard to create my initial dataflow. Point the wizard to one of the text files, setup the proper column names, types, sizes, name the table, and run the task. This will create the staging for you along with the dataflow to do the import.
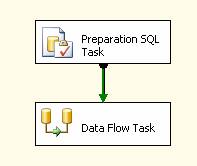
The wizard will create a “Preparation SQL Task” that tries creates the table for you. Since you don’t want to do this repetitively, either delete the Preparation SQL Task, or add some code so it only fires if the table doesn’t exist.
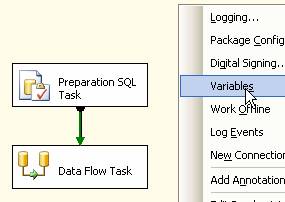
Create the Package Variable
Right click in the Control Flow designer, and select Variables.
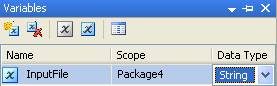
Add a variable and give it a name like InputFile. Change the type to string so it can hold the filename.
Add the Foreach Loop Container
Add the Foreach Loop Container to the Control Flow designer. Double Click to edit the container.
Select “Collection” in the left pane of the editor. Set the folder that the files will be delivered into, as well as the wildcard naming in the Files field as shown below.

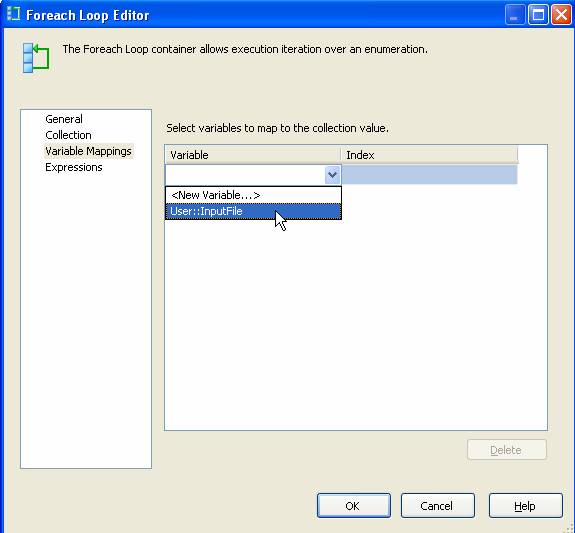
Select “Variable Mappings” in the left pane of the editor.
Click the dropdown for variables and select the variable you created earlier.
The Index field should be set to the default of “
Click OK.
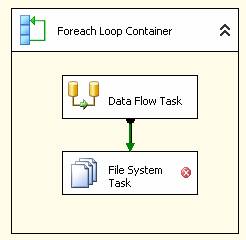
Put your flow logic into the Container
Drag the Data Flow Task that the wizard created into the container. For each file the container finds, it will process whatever is inside.
So that you don’t process the same file over and over, it is a good idea to move the file to a processed area. Go get a File System Task from the Toolbox and put it in the container also. Connect the DataFlow to the FileSystemTask.
Defining the File System Task

![]() Set the operation to “Move file”.
Set the operation to “Move file”.
![]() Set the “Source Connection” to be variable and
select the Variable we defined in the “Source Variable” using the drop down.
Set the “Source Connection” to be variable and
select the Variable we defined in the “Source Variable” using the drop down.
![]() Set the “Destination Connection” to not be variable
as the files will all go to the same location.
Set the “Destination Connection” to not be variable
as the files will all go to the same location.
![]() Click the drop down for Destination Connection
and select <New connection>
Click the drop down for Destination Connection
and select <New connection>
![]() Select “Existing folder” from the File
connection Manager Editor that pops up and assign the proper folder. This can
be something like a “Processed” folder right under the directory you are
reading from.
Select “Existing folder” from the File
connection Manager Editor that pops up and assign the proper folder. This can
be something like a “Processed” folder right under the directory you are
reading from.
![]() The File System Task will still have an error at
this point because it really doesn’t know the name of the input file. It won’t
know the name until runtime. To get rid
of this error, right click the File System Task and select properties. Set the DelayValidation variable to True.
The File System Task will still have an error at
this point because it really doesn’t know the name of the input file. It won’t
know the name until runtime. To get rid
of this error, right click the File System Task and select properties. Set the DelayValidation variable to True.

At this point the Foreach Loop Container will grab however many files are residing in our source directory with the right file pattern and perform all the logic inside the container. However, we have the dataflow task still hard coded to the one source file that we selected while using the wizard. We must assign the InputFile variable to the source connection.
Assigning the Variable to the SourceConnectionFlatFile
Right click the SourceConnectionFlatFile in the Connection Manager and select properties.
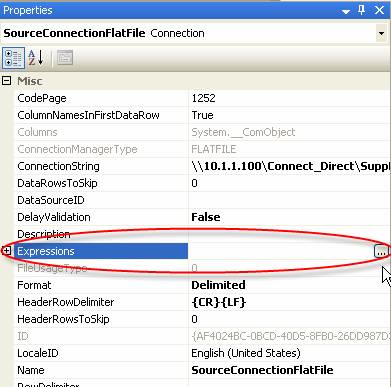
Notice that the ConnectionString has the hard coded value we chose earlier. This is overridden by using Expressions. Click the ellipsis next to Expressions. Use the Property dropdown and select ConnectionString as shown below.

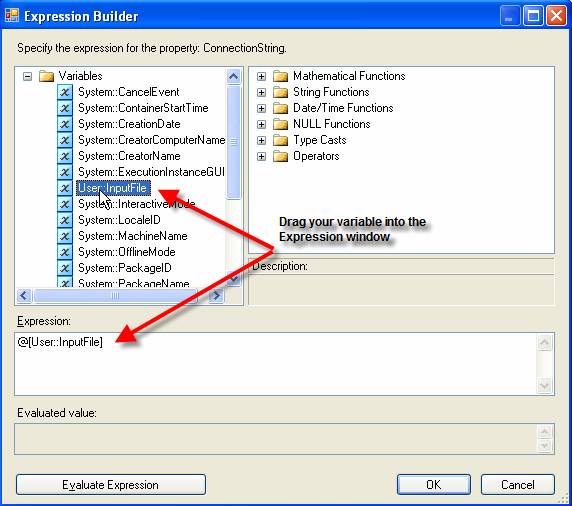
Click the ellipsis next to the Expression box. Expand the Variables and drag your InputFile variable into the Expression windows. Select OK twice.
Your SouceConnectionFlatFile properties should look like this now if you click the plus sign to the left of the Expressions property.

That’s it. Run the container and you will see it cycle through each file performing the DataFlow and the FileSystem move file operation. After it finishes, the table should have all the data and the files will have been moved from the source directory to the processed directory!